Over time, I have witnessed a particular scenario a few too many times:
- A person demonstrates complete unwillingness to learn how to use version control, be that due to "lack of need" or delightful claims of their existing approaches (which most often turn out to be manual backups) being sufficient or even superior.
- A person loses days, weeks, or even months of work due to human error and/or hardware failure(s).
- Noticeably bitter about the situation, a person attempts to continue defending their position.
Having spent far too much time arguing with people and explaining how to use version control, I have decided to make a blog post that would cover a few things on the matter:
- Explain the advantages of version control over "simpler" backups.
- Explain (step-by-step) the basics of using a common combination for version control being BitBucket (service) + Git (software) + SourceTree (GUI client).
While this tutorial is oriented on GameMaker: Studio users, it can also be easily applied for other tools.
Advantages
To name a few,
- Filesize: A conventional backup, unless specifically culled, "weighs" as much as the base project. With version control, on other hand, only the "changes" are to be stored, meaning that if you have changed 1KB worth of code at one point, the "commit" (changes) for that is going to be just about 1KB.
-
Organization: A backup may need explicit notes attached to it to signify, which files have been changed. Version control permits to view what files have been changed, when, and even look up when a particular line of code was last edited.
Also, no files named "Project Final Final (for real this time) (3)". -
Reliability: Perhaps the most common mistake is storing backups on the same hard drive as the project, meaning that hard drive failure wipes both.
The second most common mistake is storing all backups on an external SSD drive (while SSDs are more short-lived than HDDs), meaning that SSD failure destroys any existing backups.
Version control permits automatically syncing the changes with a remote server (or servers), and multiple services exist to help warranting that data will not be lost in any situation. - Versioning: Partially linked with item 1 - due to filesize concerns, it is usually not possible to store every single backup on an external drive or cloud storage, meaning that older or "less important" backups will eventually have to be discarded. Version control permits to revert the project to the state as of any given change.
- Branching: Backup-based approaches require coordination and transmission of individual changed files. Version control permits multiple people to work on the project at the same time and to merge the changes (most often, completely automatically).
While the use of version control would originally require certain familiarity and ability to read manuals, nowadays the situation is improved vastly - multiple visual (GUI) clients exist for working with version control software, multiple services exist for hosting projects privately or publicly (as previously mentioned), and overall there are very few excuses to not make use of this.
So, let's start - you only need the ability to read and a bit of time. No monetary investments required.
Setting up a repository
First, you'll need to set up a repository somewhere.
The common options are GitHub and BitBucket.
Out of the two, BitBucket has better starting plans, so we're going to use that here.
So, navigate to BitBucket, create an account (or login to an existing one), and pick "Repositories - Create Repository" in the menu (or go here). The meaning of options are as following:
- Repository name, is, well, the name of the repository, as shown in the UI (on-site or in client).
- "This is a private repository" checkbox determines whether a repository is going to be private (access by invitation) or public (anyone can access).
-
Repository type determines the version/revision control system used for the repository.
There are long debates on the matter of which one is better and in the context of this post it isn't going to matter much. - Description is shown on site. There's not much need to fill this out for private repositories.
-
Issue tracking and Wiki check boxes enable the two according features.
Similarly to description, there isn't much need for either if you are the only (or one of a few) people working with the project, though issue tracking can also be used as an internal todo list. -
Language determines the initial repository configuration.
As of writing this post, BitBucket does not have a preset for GameMaker projects, so you can leave this at the default value (we'll go over the configuration later).
That said, you can just fill out the "repository name" field and click "Create repository". And there - you now have a repository.
Setting up a version control client
The next step is to get software that would permit you to conveniently work with repository(ies).
BitBucket actively promotes SourceTree, which is a piece of software by the same company:
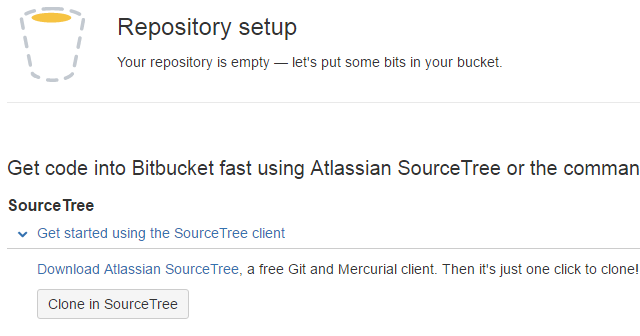
SourceTree is fine. While it does not attempt to do fancy syntax highlighting like GitHub Desktop or GitKraken, it's lighter on resource usage (won't choke when viewing an initial commit with a thousand of files) and supports both Git and Mercurial.
Cloning a repository
After you have installed the desired variant of software, you'll need to "clone" (download) a repository.
If you've picked SourceTree, that is achievable by clicking the "Clone in SourceTree" button.
Otherwise you'll need to take the repository URL (https://Name@bitbucket.org/Name/RepName.git, shown in the "Command-line" section on BitBucket) and open a "Clone repository" dialog.
This will bring up a dialog like this (with slight differences depending on the software used):
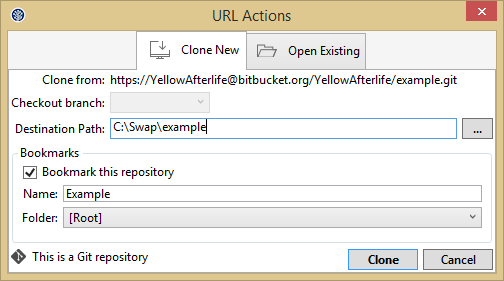
The only important option here is "Destination Path" - that is the location, to which the files are going to be downloaded, and which will be checked for changes by version control software.
Most commonly you would want this to be the directory where the project already is, but, for various reasons, most version\revision control clients will not let you clone a repository to a directory that contains any files.
So, if you want to keep the repository in a ProjectName.gmx directory (as opposed to having it in ProjectName directory), you'll need to temporarily rename the original directory.
After clicking Clone and waiting for a few seconds you will have the repository folder set up and containing either nothing at all (aside of a hidden .git directory, which houses the changes and other data) or a few pregenerated files (.gitignore, readme.md). The repository will also show up in the client program.
Initial commit
Now that you have your repository on the server, disk, and in the version control software, it's about time to actually push the project files into it.
First, you move the project files into the repository folder (via file explorer).
Then, you open the project repository in the version control software. In SourceTree this requires double-clicking the repository in the list on the left.
A repository tab opens afterwards, where you can see a couple of things, but, most importantly, the "File Status" tab (can be named differently in other programs). Here you can see a list of files that have been changed but not yet committed. In this case, all the files, basically:

This is also the point where you can pick the files and directories that will not be stored in the repository.
To exclude a location, right-click a file in the list, and pick "Ignore..." (which brings up a little menu where you can pick whether to ignore changes to a file or directory).
Also note that "ignoring" a file is not the same as deleting it - the file will remain on disk (and be accessible), and simply not included in the repository. So, if\when you would download the repository contents (e.g. from a different device), you will need to copy the ignored file(s) manually, if they are needed.
For GameMaker, it usually only makes sense to exclude two locations:
-
Configs/: This is the directory that contains everything you set up via the Global Game Settings menu. The files are not particularly large (~6MB total), but numerous (~200), and may change when opening a project with a different version of GameMaker: Studio.
Should you forget to copy this directory into a freshly downloaded repository, GameMaker will happily populate it with default contents, but you will need to make your changes to the GGS again. To avoid doing so, you can store a copy of this directory separately (e.g. on Dropbox or Google Drive). -
sound/audio/: This is the directory where the audio files (WAV/MP3/OGG) are stored.
Audio files are one of the largest in project directories as-is, and version control does not pick up partial changes on MP3\OGG too well.
As the result, audio files often occupy and overwhelmingly large part of space used by the repository, while not serving much purpose (unless you direly need to listen to previous versions of your sounds).
GameMaker: Studio replaces any missing audio files with standard "ding" sounds compile-time, so excluding these from a project does little to no harm.
Also note that you will need to change the location in the pop-up dialog to sound/audio/ (and not just sound/) or you will also exclude the actual sound resources from the project: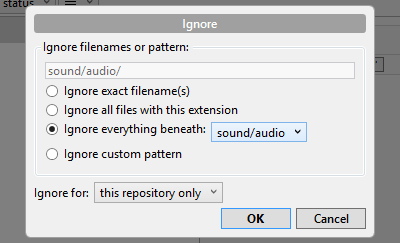

As can be noted, "ignoring" locations via GUI adds lines to .gitignore file, which can also be edited manually for convenience or "un-ignoring" the files (which is not easily doable via GUI because you had explicitly asked to not show you these files).
Once you are done with picking the files that should not be uploaded/downloaded, you can click the checkbox near the "Unstaged files" label to include them in a "commit".
Then you enter a commit message, flag the "Push changes immediately to ..." checkbox (unless you want the files to be uploaded later), and hit the "Commit" button underneath that field (or by pressing Ctrl+Enter). That will start the upload process and you will be able to see the project files on the web version of the chosen service as soon as it finishes.
Making changes
Now that your project is in sync, you can continue working with it as usual in the repository folder.
And, time to time (commonly after a bunch of changes were done), open the version control software to commit the new changes.
As previously mentioned, the GUI will show you which files you have changed since the last commit, and allow you to view the portions of files that have been changed:
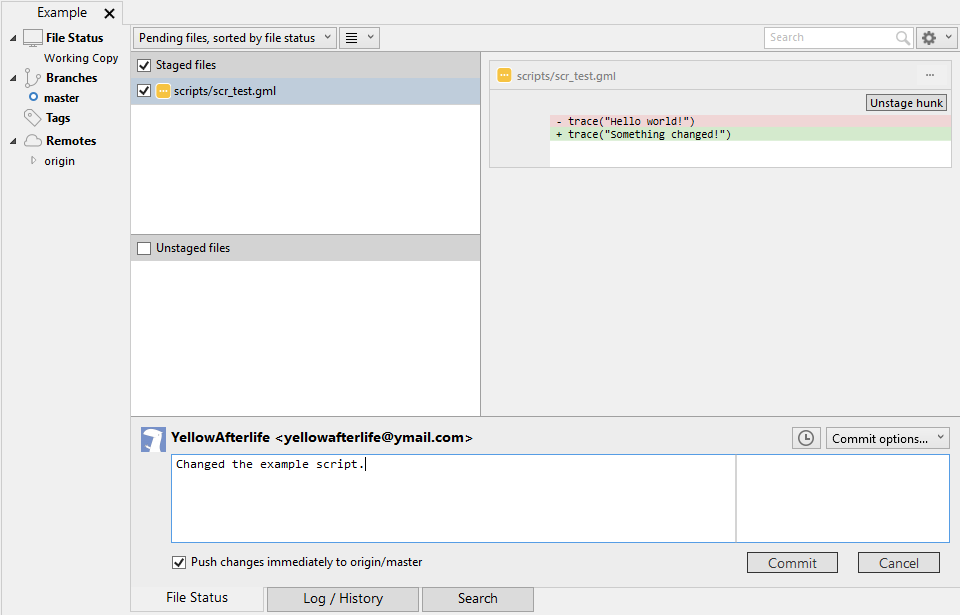
So you can review changes, group them into one or more commits (by using checkboxes near the individual files rather than the one on top), or discard the change(s) altogether (by picking "Discard" from the per-file context menu).
Similarly, once you are done picking the files to be committed, you enter a commit message, hit Commit, and the changes sync to the server.
Since only the changed portions of files are transmitted, such subsequent commits will be much smaller and upload quicker than it would have taken with a complete copy of a project.
Viewing changes
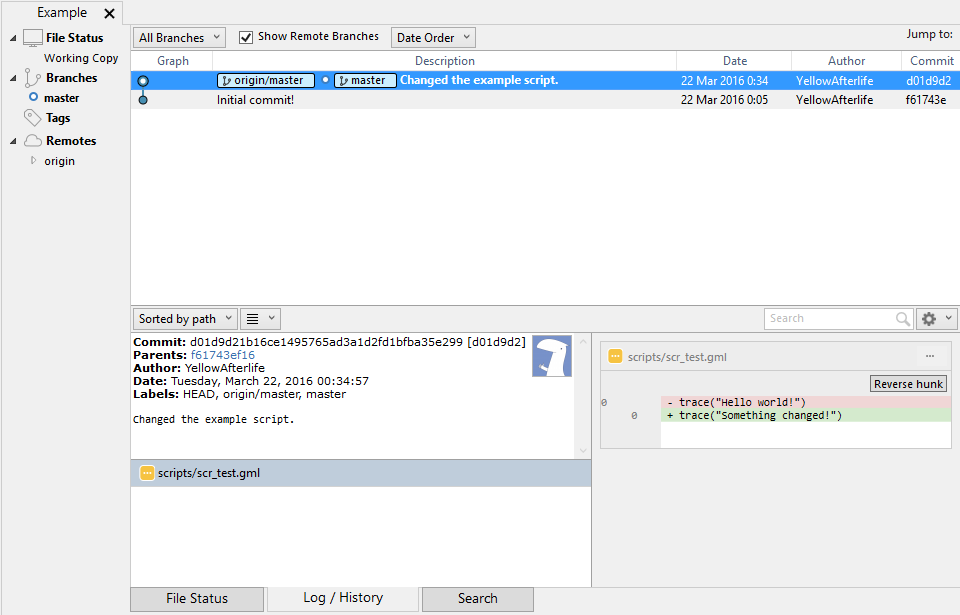
If you need to review your past changes, you can do so in the "Log / History" tab.
Here you can pick individual commits and see the files and changes in them:
If you need to revert the project to a state as of a particular commit, you can do so by right-clicking a commit and picking "Reset current branch to this commit". It is generally adviced that you commit any uncommitted prior to avoid mixing changes to the current version with the older files.
Collaborating
If you have created a private repository, you will need to explicitly grant people access before they will be able to download the repository contents or make changes.
BitBucket makes this option prominent by having this average-sized banner on the right side when viewing the repository page:

So you click that, enter people' email(s), pick the access rights ("Read" to let people download the changes, "Write" to also allow them to make changes), click a button, and the invitations are sent.
Then they accept the invitations, clone the repository (which now has the project in it), and can similarly work with it.
When remote changes have been made, you can apply them to the local setup via the "Pull" option.
"Fetch", in contrast, will check and download the changes, but not apply them to the local setup.
By default, most version control programs will check for remote updates on repositories once per 10 to 15 minutes. If you know that a change have been made, picking "Pull" or "Fetch" will also re-check for changes.
So long as the exact same portions of files are not changed by multiple people at once (local changes versus the just-downloaded commit), no additional issues arise. If you did happen to do such a thing, you'll need to either discard the change and re-apply it in another commit, or look up "branch merging".
In conclusion
While familizaring yourself with version control takes a bit of time, subsequent operations take much smaller amount of time/effort, and long-term advantages far outweight the time spent learning.
If I have overlooked something in this post, feel free to ask.
Have fun!
So since we ignore the audio folder, what do we do to keep it updated? Do we manually pend the folder when actual changes are made, or never pend it and make physical backups of the folder and use them when needed?
You would backup the folder via non-versioned means – e.g. Dropbox or Google Drive. This way you would be able to get the current version when needed (or restore it in case of loss) without increasing the repository size.
Oh, okay. So whenever I make a commit and I’m aware of adding / removing / replacing audio files, I simply back up the folder then.
Alright, thank you for the quick response!
I’m curious about the “Use Source Control” checkbox when creating a new project, and noticed there is no mention of it in your guide. Is there currently no workable integration between SourceTree and GM:S despite the fact they both employ GIT commands?
SourceTree is a GUI client. GMS provides it’s own GUI if “use source control” was checked and the everything was configured accordingly in the editor.
In theory, you should be able to manage the same project both via ST and in-GMS GUI, though I haven’t tried that personally.
This tutorial only covers SourceTree since it is slightly more straightforward (edit files – commit files – no context menus\popups), and GMS’ SVN-related GUI reveals a bug or two every now and then.
Thank you, I never even knew this existed.
Great guide. I had no idea that private repos were free on Gitbucket. I’ll definitely use that.