(click for full-window version)
As it becomes increasingly more apparent that many people are completely unware of GameMaker Studio 2 having a light skin and fail to recognize it as being GameMaker as such, I have decided to stop using it for screenshots in my assets/blog posts.
However, the default dark skin is a little boring, so I decided to make a custom one with a familiar yellow tone for accents. This also doubles as a general explanation on how to make skins.
About this skin
It may come off as a surprise, but I like me a good yellow color!
If bright enough and with a hint of gold, you can have a pleasant sunny tone.
Unfortunately, with my accidental branding mostly being centered around light-themes-compatible calm blue and white, I don't get to fit much yellow in there.
But, if we are talking dark themes, there are no such restrictions - can go as bright as you need to, and especially if it's things to pay attention to.
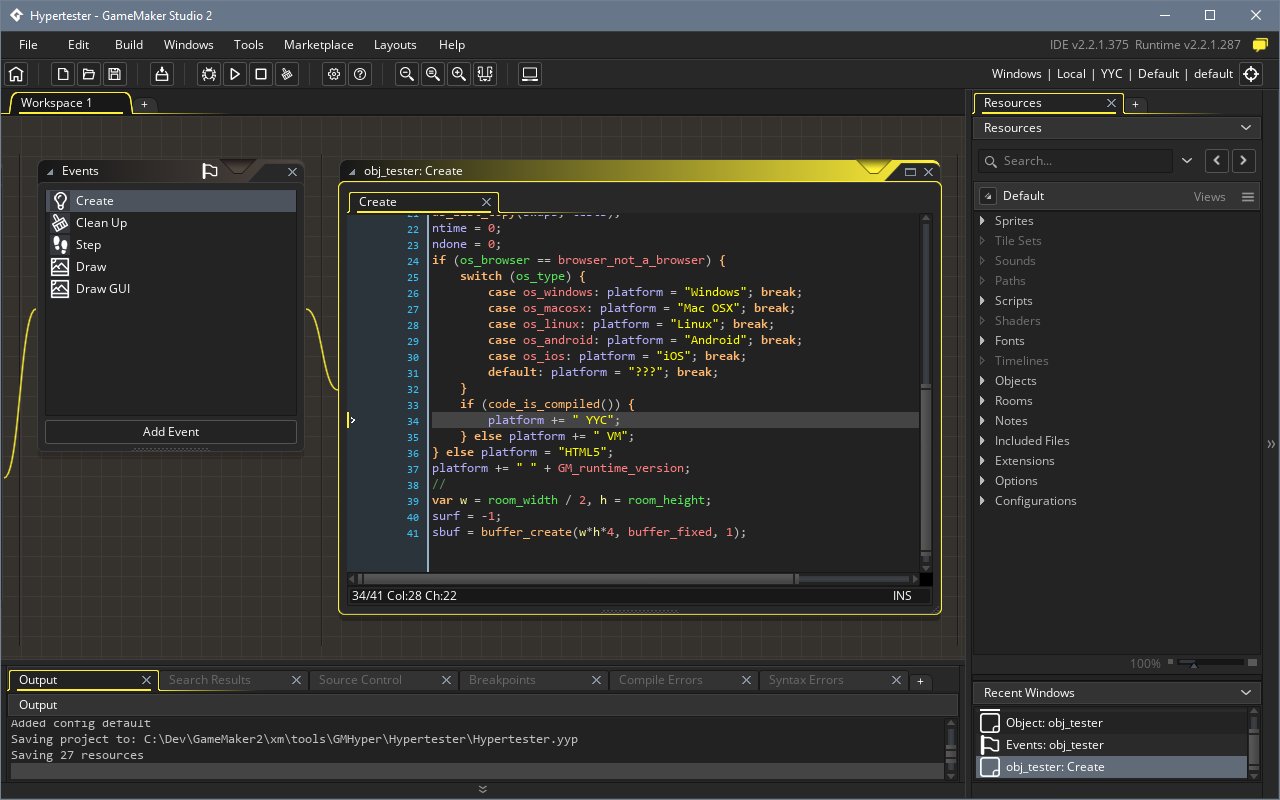
So, here you get just that - all that was green is now a nice yellow, and it really helps the details stand out compared to the [very mild] default green.
The implementation is as compact as it can be, overriding only fields and files that it needs to. This also makes it easier to edit for yourself, as there's nothing else in it.
Anatomy of a GMS2 skin
A GameMaker Studio 2 skin consists of several sets of files:
- /Layouts: Series of XML files defining what controls everything has, and in what order.
Skins will inherit these from the base skin by default, and you should generally avoid making these for lower risk of skin completely breaking whenever new IDE features are introduced. - /Styles: Series of JSON (well, slight superset of) files, equivalent of CSS.
This is where you set colors, font sizes, background images, and so on.
There's smart inheritance so your skin only needs to define properties which were changed from the base skin, letting you keep your JSON files pretty small.
Unfortunately, as of writing this post GMS2 does not support more than one layer of skin inheritance yet, so making light skins is kind of rough. - /Images: 9-slices, thumbnails, and everything else. Referenced by styles or layouts.
For the most part, these are inherited from the base skin, except for few random things which aren't. Good news, however: if you have a missing image reference, you'll just see a classic [x] error image in IDE. - /Cursors: Custom cursors in PNG format for image editor and other occasions when GMS2 needs a purpose-specific cursor.
For the most part, skins only need to override parts of Styles and Images (and, occasionally, Cursors), leaving anything unrelated more or less untouched.
Installing skins
- Navigate to %PROGRAMDATA%/GameMakerStudio2
Note: not Program Files! Skins folder in PF will get overwritten whenever IDE updates.
On Mac, it's likely in Application Data - check where runtime_feeds.json is via Finder. - Open the Skins directory, or make one if it's not there yet.
- Extract your skin into a subdirectory in Skins so that you have Skins/<skin name>/Styles, etc.
- Choose the skin in GMS2 via menu:File - Preferences - General - IDE Skin.
Making skins
First things first, it was mentioned in past that there are plans to overhaul skin support to make it easier to create custom skins, so I'd hold off making any large-scale skins for sole purpose of it taking more time than it would (and should) in future.
So, some tips:
- Check the default dark skin for general reference on what is what.
(it can be found in your installation folder under GUI/Skins/Dark) - Check the default light skin as first source of reference on color changes, as it has to override pretty much all of them.
- If you cannot for the life of you find what style name of something is, look for the nearest related texture instead (like panel 9-slices), replace the candidate images with bright solid colors (magenta/lime/etc.), and then search in style files (clarity: using Ctrl+Shift+F in most code editors, not by hand) for references to that image once you identify which image it is. If you still cannot figure out the style of the actual element, search in layout files for the style name of image element, and then see what's next to it.
- Pick apart existing skins! Even if a skin ships with a complete modified copy of a default skin (not the best thing to do), you can find what styles it changed by doing directory comparison (diff) between it and the original skin.
- Restart the IDE to see changes to your skin.
This is perhaps the slowest part in the current process so it's good to make multiple changes at once.
Downloads
You can get the yellow accent skin from GitHub ("Code" tab -> "Download ZIP")
You can also tweak the skin's styles/images to your own liking for custom accent colors.
Have fun !
So good to use!
Very cool skin
10/10
Really cool skin. I loved it)